I’d love to share a fun and useful DIY project of mine. Coiled rope coasters. I learned how to create coiled rope crafts in my high school art class. It was a fun and calming project that allowed me to create something fun and useful while talking to my friends in class. So let’s get to it.
Supplies
- cotton rope
- yarn
- knitting needle
- scissors
Procedure
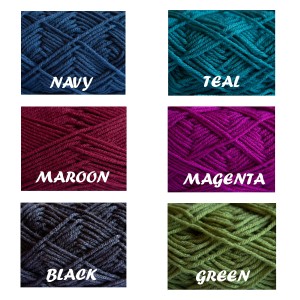
- Let’s start off with picking your supplies. To be more specific your yarn. The colors are your choice. If you’re making it for yourself or someone else think about what would work well with their home decor. Here are the color options that I use for the coaster that I sell on my Etsy shop cnscreation.
- You can also decide on the size of the rope you want. I like 1/4″ cotton rope that I buy at Lowes. Some people like to use clothes line rope, which is completely acceptable. I don’t cut my rope until I’ve reached the end so you don’t have to measure the length of rope that you’ll need. You’ll also need a knitting needle. I like to use plastic knitting needles. The current one’s that I have came from Michaels craft store (one of my favorite places to shop).
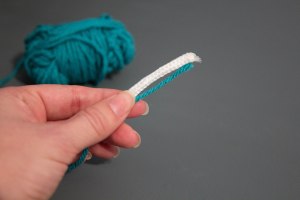
- OK, so now time to start! Cut a long piece of your yarn and thread it through your needle. Line up 2″ of the end of your yarn with the end of your rope.
- Now, working back towards the end of your cord, start wrapping the yarn around this section you lined up, to secure it. Stop when you get to the diagonal cut.
- Fold the end over so that the ends of the yarn wrapped section line up.
- Start wrapping the yarn so as to connect the the end of the rope to the rest of the uncovered rope. Stop when you have continued wrapping the cord 1/2 to 1″ past the diagonal cut.
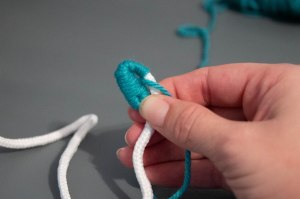
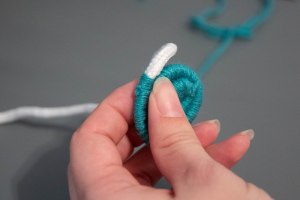
- Start wrapping the end of the cord inward, to start an “e” shape.
- Bend it in even closer, so that it is all touching in a tight spiral shape. Hold this spiral tightly in place.
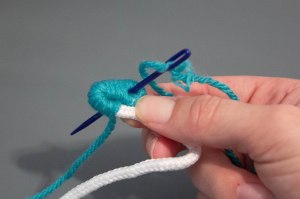
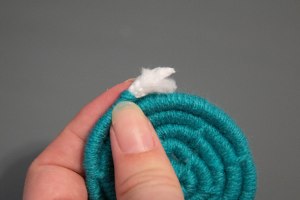
- To anchor this coil pass your needle through the center loop that you created.
- Pull the yarn all the way through.
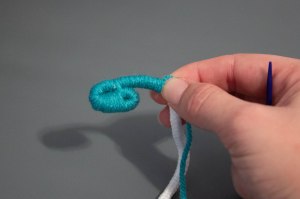
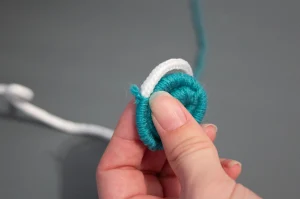
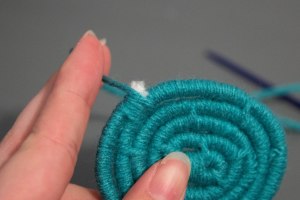
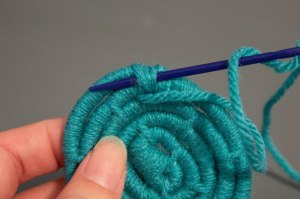
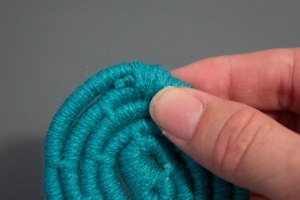
- Then, you repeat this part. Wrap the yarn 6-7 times around the rope, and then take another stitch in the rope above to anchor. 6-7 wraps, then an anchor stitch. You’ll want to stagger your stitches otherwise your coaster won’t be as sturdy.
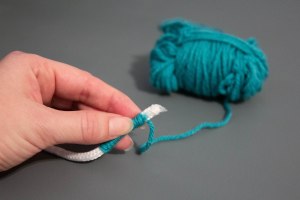
- When you need more yarn, I like to cut a new piece of yarn and tie it with a small knot to the current piece and continue on. Once the knot reaches the rope try to make the knot lay in between the rope. As seen in the photo.
- Wrap the yarn over the cut ends of yarn to help hide it.

- Check the size when you’re ready to end your coaster. The average coaster is 4″. Cut the end of the rope diagonally. Then you can wrap and stitch this end down to the last coil of your coaster.
- Some people choose not to use a knot at the end and simply wrap the yarn around the end like they did when they started it. I however, LOVE a good knot to hold things in place.
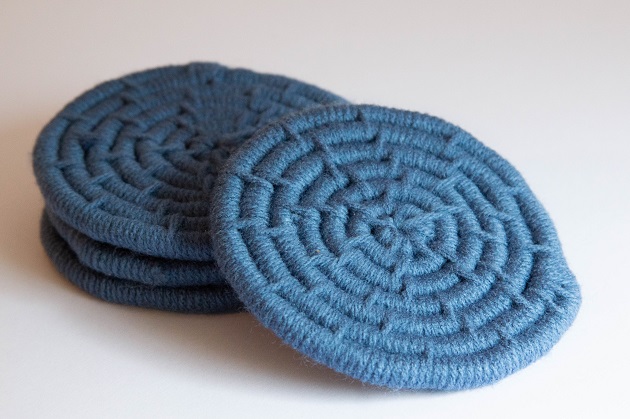
You did it!
You’ve now made a coil rope coaster! Hurray! These are great light weight absorbent coasters. What a great low-cost project, am I right? They’re perfect gifts for students in the dorm, a first apartment, a parents RV, a coworkers desk. I’ve given them as Christmas gifts and I sell them at my Etsy store cnscreatation.
Well, I hope you enjoyed this project. If you’ve made some coiled rope coasters post your photos in the comments! I’d love to see your what color or colors you choose and see you using them too.